Follow the instructions below in Server Backup Enterprise or Advanced to add a new Control Panel Instance to a Policy.
To add a control panel instance:
1. Select the "Control Panels" tab in the "Policy Properties" window. You can do so while creating a new Policy, as shown below.

You can also select the "Control Panels" tab in the "Edit Policy" window after the Policy has been saved and even run. See Edit policies.

2. On the "Control Panels" tab of the "Edit Policy" window, click on the "Add Control Panel Instance" button.

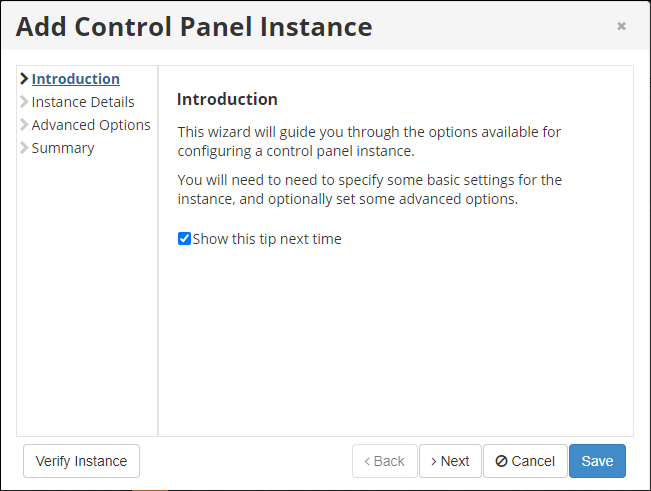
3. The "Add Control Panel Instance" window will appear. Familiarize yourself with the introductory information, and click "Next" to proceed with adding the Instance.
4. On the following "Instance Details" screen, you can define the options for your Control Panel Instance:
- Enabled - Use this check-box to enable or disable the Control Panel Instance. If an Instance is disabled, it will not be discovered during replication, and Control Panel users will not be able to access their data from any recovery points created while the Instance is disabled.
- Name - Define a name for the Control Panel Instance to identify it. A Control Panel Instance's name must be unique to its Policy, meaning that no more than one Instance associated with a Policy can have a particular name.
- Description - Enter additional information about the Control Panel Instance. This information is optional, but if specified, it must also be unique to the Policy.
- Type - This is the type of the Control Panel Instance. It specifies which type of Control Panel is being configured and can be defined as one of the following:
- cPanel
- Plesk
- Virtuozzo
- Parallels Pro
- Interworx
- DirectAdmin
- Parallels H-Sphere
- Linux Home Directories
- Custom
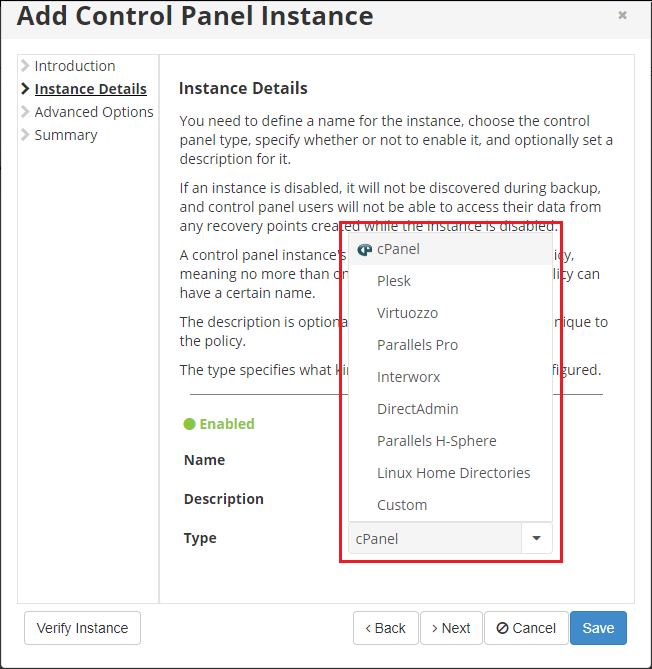
The "Custom" option allows you to add your own Perl script to use a new type of Control Panel. If using this option, you must fill in two additional fields: "Custom Auth Script" and "Custom List Users Script."

Click "Next".

5. If your Control Panel is installed inside a Parallels Virtuozzo Containers (PVC) container, you need to specify the Virtuozzo Container ID (for cPanel, Plesk, Parallels Pro, Interworx, or DirectAdmin types). This advanced option is not available for the Virtuozzo Control Panel type.
Here, you should also choose one of the following verification log levels:
- Alert
- Warning
- None

6. In the advanced options, there is also an option to enable and use the InnoDB_Force_Recovery option for MySQL database restores.
By enabling this option, control panel end users will be provided an option to select the value for InnoDB_Force_Recovery, when they attempt to restore a MySQL Database. 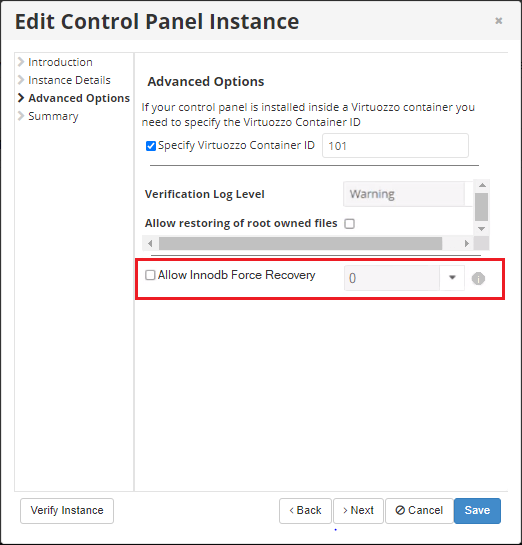
Once the option is enabled, you should also choose the max level, from the drop down. The permissible nonzero values for innodb_force_recovery are 1 to 6.
If a value of 2 is set in the drop-down, then your control panel end users can only select from values of 0(default) to 2. If 4 is selected then they will be able to select from 0 to 4.
NOTE: MySQL does warn that a innodb_force_recovery value of greater than 0, should be used in an emergency situation.
More information on the innodb_force_recovery option can be found at https://dev.mysql.com/doc/refman/5.7/en/forcing-innodb-recovery.html
7. Click "Next".
8. On the last "Summary" screen, the settings you have selected will be listed.

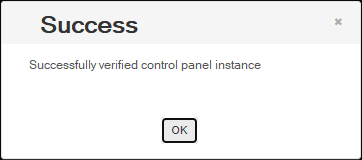
9. You can verify the Instance before saving by clicking the "Verify Instance" button.

If the verification is successful, a dialog window will appear. Click "OK".
If the verification fails, the "Error Messages" window will appear. This means that Server Backup cannot find the Control Panel type you specified. Make sure you have selected the correct Control Panel type.
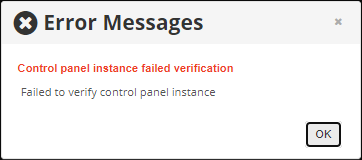
Click "OK" and try to fix the error. Then verify the Instance again.
10. Once you have verified that the specified settings are correct, click "Save" to add your Control Panel Instance to the Policy.

11. The wizard screen will close, and the added Control Panel Instance will appear on the "Control Panels" tab of the "Edit Policy" window. Instance options are displayed under the Actions icon

The following actions over the Control Panel Instance are available via the icons:
- Edit - Allows you to change and add Instance options.
- Verify Instance - Verifies that the Instance actually exists on the specified agent.
- Disable - Disables the Instance. This will prevent the Instance from being discovered during replication, and Control Panel users will be unable to log in to Server Backup to retrieve their data.
- Delete - Removes the Instance without prompting you to confirm.
11. Click on the "Save" button in the "Edit Policy" window to save your changes.

12. Once you have added the Control Panel Instance to the Policy, the system will display a direct link to Backup Manager for Control Panel users in the "Login" column. Using the link, users can access their backups and restore data as a .zip or .tar file. To log in, they must use their Control Panel credentials.
