Follow the instructions below in your Server Backup Manager to add and configure an Exchange instance on the Policy.
1. Select the Exchange tab in the Edit Policy or Create New Policy window. 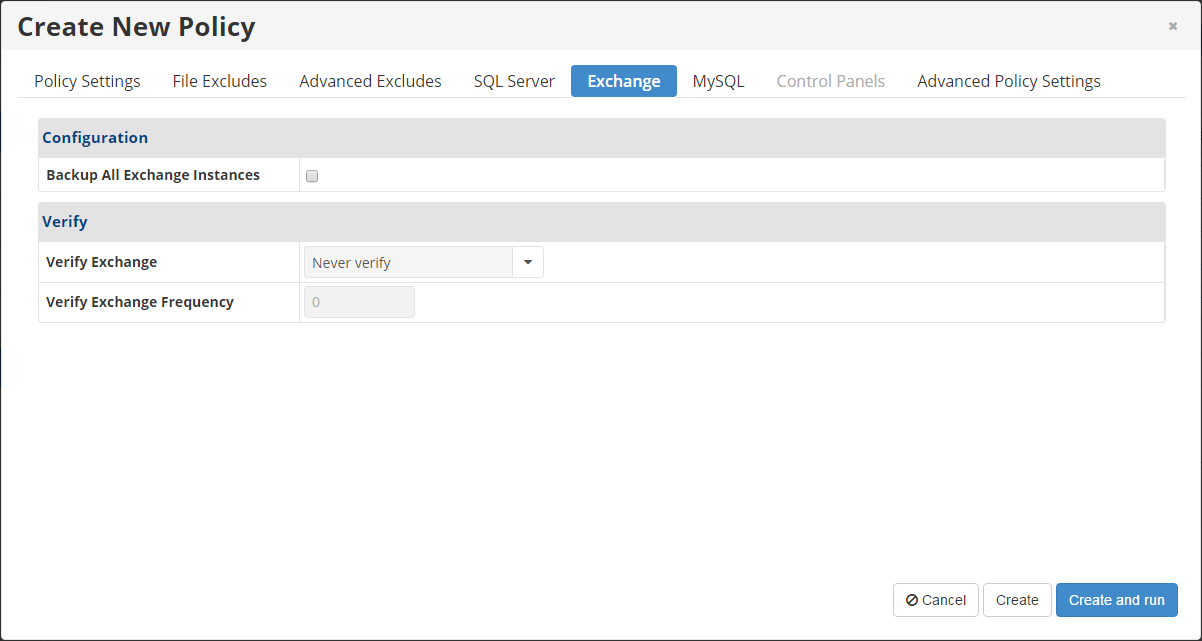
2. On the Exchange tab of the Create New Policy/Edit Policy window, define the following options:
- Backup All Exchange Instances - Select this check box to perform Exchange database replication.
- Verify Exchange - Indicates whether to perform a database consistency check. The following values are available in the drop-down list:
- Never Verify - Does not verify after backups. This option is selected by default. It is the recommended value for MS Exchange 2010.
- Always Verify - Verifies after every backup.
- After Every X Successful Backup - Verifies all backups after several backups complete successfully (the number of successful backups is specified in the Verify Exchange Frequency field).
- Verify Exchange Frequency - Specifies how often the verifications must be done. For example, if you enter 5 in this field, the Exchange is verified after every 5 backups.
3. In the Create New Policy window, click the Create button to create the policy, or click the Create and Run button to create the policy and run it immediately.
In the Edit Policy window, click the Save button for your changes to take effect.
4. Once the policy completes successfully, you will be able to restore your MS Exchange.
| Note If the Exchange Server has files across more than one device then the Multi-Volume Snapshot check box must be selected on the Advanced Policy Settings tab. Failure to select Multi-Volume Snapshot will cause an alert to display. |
Labels:
None