It is possible to create new Volumes on Server Backup Managers using the Data Center Console. Follow the instructions below.
1. Select Volumes from the Main Menu.
You will enter the "Volumes" screen.
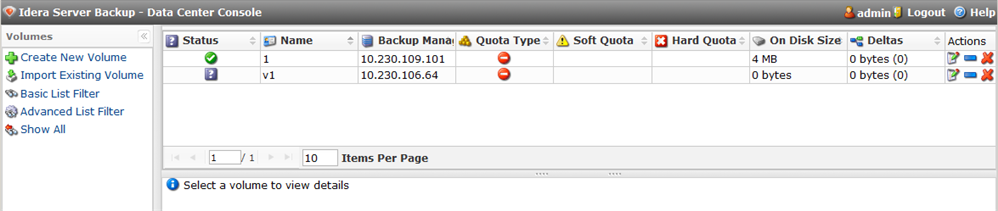
The list of all Volumes from all connected backup managers is displayed.
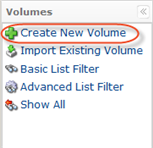
2. Click on "Create New Volume."
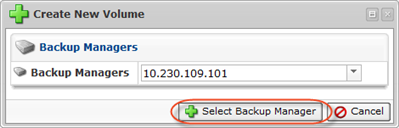
3. Select the backup manager form the drop-down menu and click "Select Backup Manager."
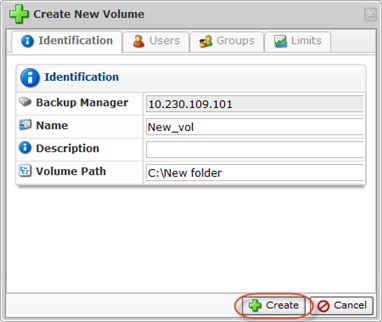
4. The "Create New Volume" window will open.
The window contains the following tabs:
- Identification
- Users
- Groups
- Limits
Identification
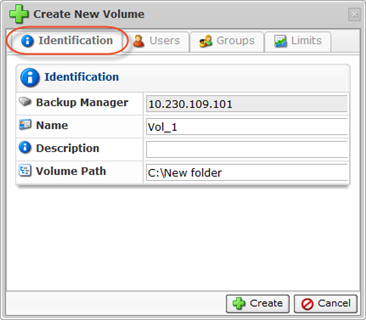
Define the following Identification options:
- Backup Manager - Shows the chosen backup manager.
- Name - Volume name is used to identify the Volume in the system. For example, to assign a Volume to the Disk Safe, you need to select a Volume name from the drop-down menu.
- Description - Additional information describing the Volume. The Description is displayed in the Volumes list.
- Volume Path - New or existing folder. The assigned Disk Safes will be placed in this folder.
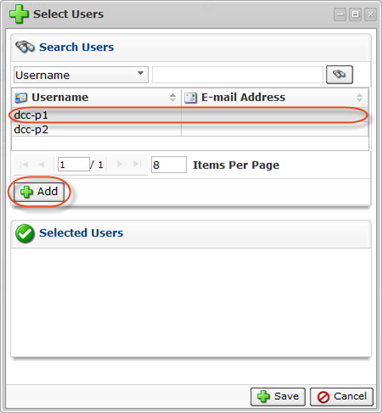
Users

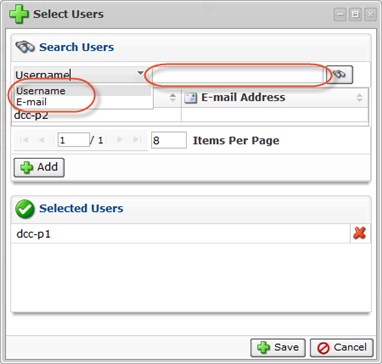
This tab allows you to assign users to the Volume, click "Add." The "Select Users" window opens. Select the users and click "Add."
| Note If you need to remove an assigned user from the "Selected Users" list, click on the "Delete" (red X) icon in front of the user. |
You can search users by username or E-mail. Select the search parameter from the drop-down list, fill in the search field and click the search button.
Click "Save" after adding Users.

Groups
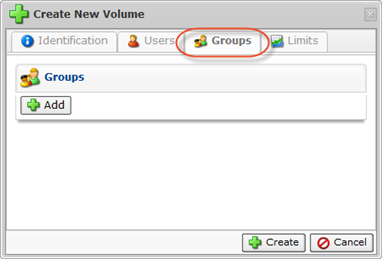
This tab allows you to assign groups to the Volume, click "Add." The "Select Groups" window opens. Select the groups and click "Add."
| Note If you need to remove an assigned group from the "Selected Groups" list, click on the "Delete" (red X) icon in front of the group. |

You can search groups by name or description. Select the search parameter from the drop-down list, fill in the search field and click the search button.
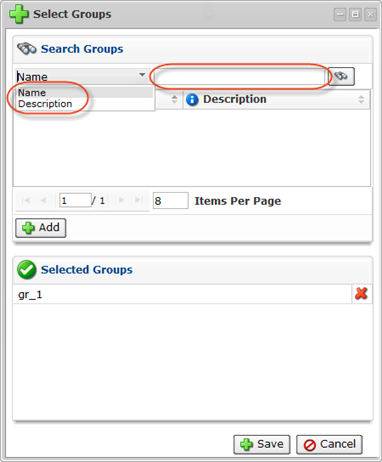
Click "Save" after adding Grops.
Limits

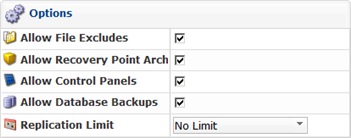
This tab allows you to create Data Retention rules, define Quotas, and set other options.
Options
Data Retention

Here you can set the limits for Recovery and Archive Points stored in all of the Disk Safes assigned to the Volume. When the combined number of Recovery/Archive Points in all of the Disk Safes exceeds the defined limits, the old Recovery/Archive Points will be merged.
Quotas
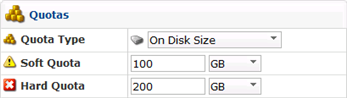
Quotas are set to limit the disk usage of the Volume. The limit is set for all Disk Safes in the Volume on the basis of space occupied by Disk Safes, size of deltas, or number of deltas.
| Tip You can define Disk Quotas in Configuration. |
- Quota Type - From the drop-down menu, select a quota type:
- On Disk Size - Quota is based on the raw Disk file size of all the Disk Safes and their files in the Volume's folder.
- Size of Deltas in Disk Safe - The quotas will calculate the sum of the sizes (after compression) of the actual block level deltas in the Disk Safe file. Disk Safe's overhead and unused space in the Disk Safe file are not counted against the quota.

Note
Similar to a database, the Disk Safe format adds overhead to the raw data. This can happen if you delete more deltas from the Disk Safe than you add. For example, you delete a large number of data from the data set you are protecting. That data are no longer retained in any of your Recovery Points. As old Recovery Points are merged out and block-level deltas are no longer needed, they are "freed" from the Disk Safe file. Until there is a vacuum of the Disk, the size of the Disk Safe.db file(s) will not get smaller. You can run Vacuuming but it is time-consuming, causes internal fragmentation of the .db Disk Safe files, and can affect their performance.
- Soft Quota - The value in bytes or in deltas. Soft Quota is a warning level where users are informed they are close to reaching their effective limit.
- Hard Quota - The value in bytes or in deltas. Hard Quota allows resources to be occupied by data. If the Hard Quota is reached, then the system forbids generating new Recovery Points. The replication is interrupted and failed.
5. Fill in all the requires fields and click "Create."
6. The new Volume will appear on the backup manager.