Follow the instructions below to set up the cPanel Integration plugin. The installed plugin will activate an icon within the cPanel interface so that customers can go directly to their backups via the Server Backup Manager Web Interface for Hosting Control Panel users.
| Note With the latest release, a new cPanel plugin has been made available. To know more about version support for plugins, Please click here |
Set Up the cPanel Plugin using the Paper Lantern or Jupiter Theme
| Note Installing this plugin in a non-Paper Lantern theme or cPanel version earlier than 11.44 will result in unexpected behavior and may not function properly. If you are using a non-Paper Lantern theme, please click here. |
1. From the Main menu, under Settings, select the Policies option. The Server Backup Manager will display a list of all available policies.
2.Find the necessary Policy to which the Control Panel Instance has been added. Click the ">" icon visible on the Left side of the Policy, to view the policy details.

3. Click on the "Control Panels" tab in the "Policy Details" window.

4. Click on the "Download Plugin" icon, located in the right column.

NOTE: To download the Paper Lantern or Jupiter plugin directly, access the following address: https://<SBM IP>/cpplugins/<r1soft-cpanel-plugin-version>.tar.gz
Please remember to replace the <SBM IP> with your actual SBM IP Address and the <r1soft-cpanel-plugin-version> with the version supported by your SBM.
5. Upload the file to the server.
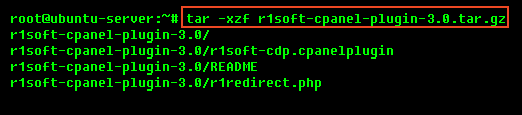
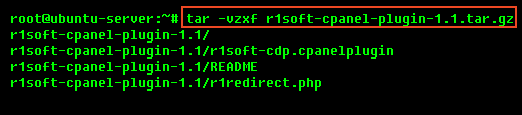
6. Extract the cPanel plugin archive using the following command:
For example, If you have downloaded the 3.0 version of the plugin, then you would use:
If you have downloaded the 4.0 version of the plugin, then you would use:
NOTE: Inside the extracted archive, there is a "README" file. This file also has directions on how to set up the cPanel plugin.
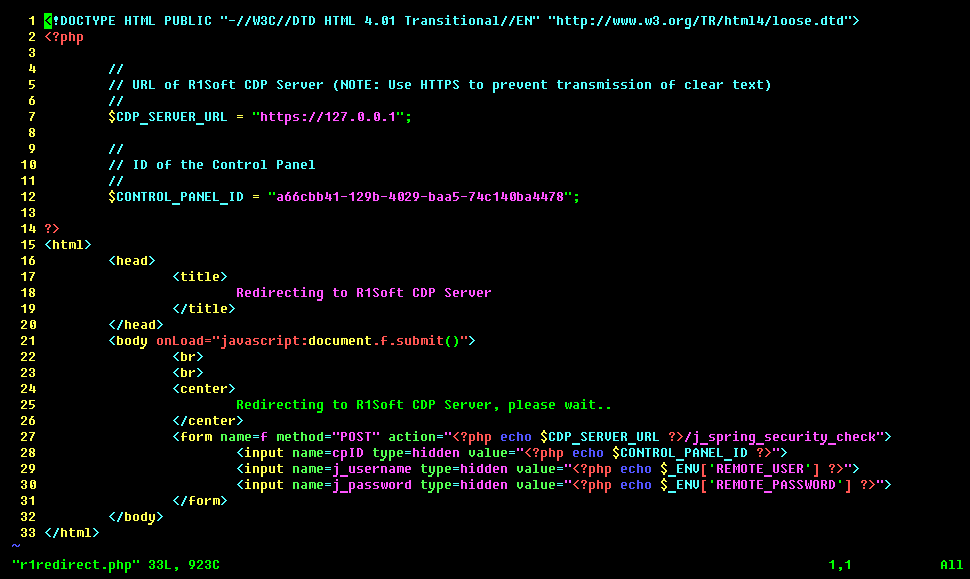
7. Open the r1redirect.php file located in <r1soft-cpanel-plugin-version>/r1redirect.php in a text editor.
For example, If you have downloaded the 3.0 version of the plugin, then you would use:
If you have downloaded the 4.0 version of the plugin, then you would use:
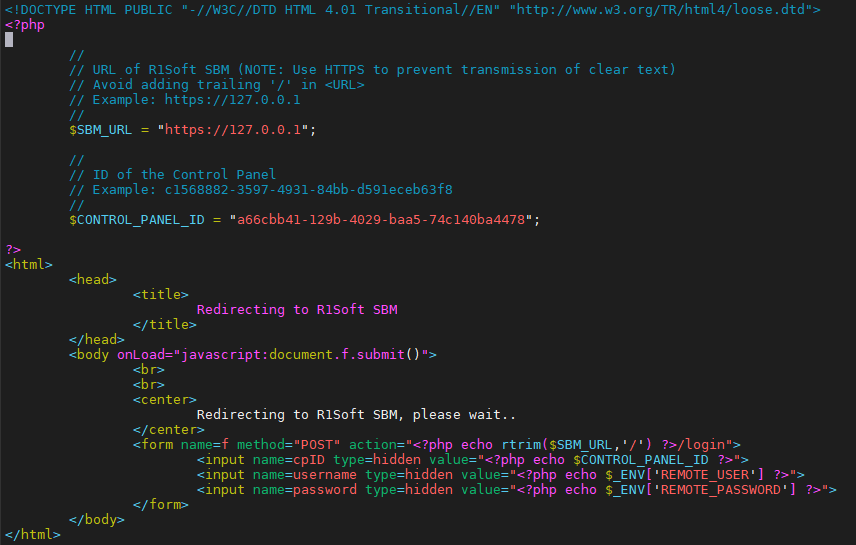
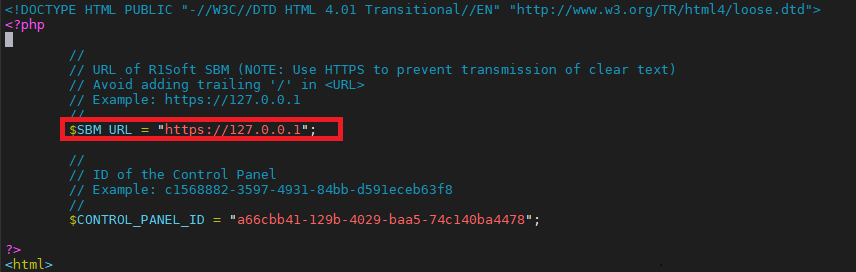
8. Locate the line that contains the following text:
Replace <URL> with the URL of your CDP server, such as "http://127.0.0.1" .
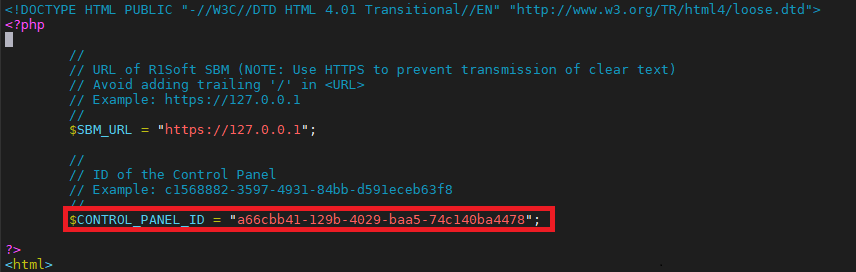
9. Locate the line that contains the following text:
Replace <ID> with the ID of your control panel instance, such as c1568882-3597-4931-84bb-d591eceb63f8.
10. Copy the r1redirect.php file located in <r1soft-cpanel-plugin-version>/r1redirect.php into your cPanel Paper Lantern or Jupiter Theme folder depending on the theme you are using.
For example, If you have downloaded the 3.0 version of the plugin, then you would use:
If you have downloaded the 4.0 version of the plugin, then you would use:
11. Install the cPanel plugin into the Paper Lantern or Jupiter Theme.
For example, If you have downloaded the 3.0 version of the plugin, then you would use:
If you have downloaded the 4.0 version of the plugin, then you would use:
The R1Soft Restore Backups link should now appear in the cPanel using the Paper Lantern or Jupiter Theme.
![]()
Set Up cPanel Plugin 1.x
| Note Follow the instructions below to install the cPanel plugin if you are using a non-Paper Lantern theme or cPanel version earlier than 11.44 |
1. To download the cPanel plugin from the SBM web interface, follow steps 1 through 5 in the previous procedure.
6. Extract the file using the following command:
7. Inside the archive, there is a "README" file with directions on how to set it up.

8. Open the r1redirect.php file in your favorite Linux text editor (vi, emacs, pico, or mcedit).
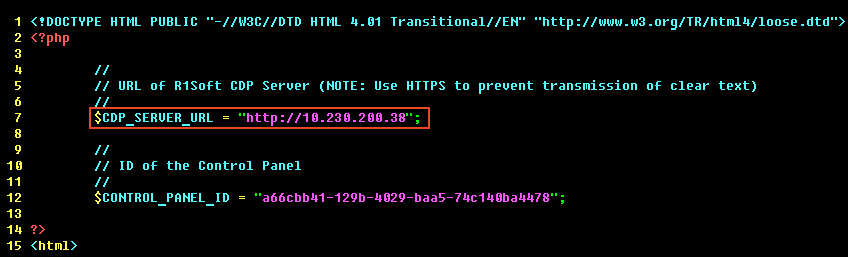
9. Locate the line that contains the following string:
Replace the URL with the URL of your Backup Manager (for example, http://10.230.200.38).
10. Locate the line that contains the following text:
Replace the ID with the ID of your Control Panel Instance (for example, 8e367b22-0ce5-481c-98ad-2667d50cf48c).
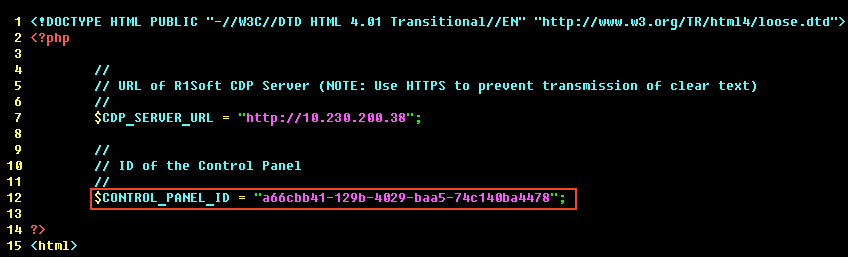
| Tip The Control Panel Instance ID is located in the "Control panel instance Id" column.
|

11. Copy the r1redirect.php file to your cPanel theme folder(s). For example:
12. Run the following command to integrate the plugin with cPanel:
13. The Backup Manager link should now appear inside of cPanel.
![]()
Plugin support version
1. If you are using a non-Paper Lantern theme or cPanel version earlier than 11.44, please ensure that you are using a cPanel plugin version lower than r1soft-cpanel-plugin-2.0
2. If you are using Paper Lantern (version 11.44 or higher), please check your SBM release version.
- For SBM 6.12 and below, please ensure that the version being used is version 2.0
- For SBM 6.14 and above, please ensure that the version being used is version 3.0
- For SBM 6.16 and above, please ensure that the version being used is version 4.0
3. If you are using Jupiter theme.
- For SBM 6.16.5 and above, please ensure that the version being used is version 4.0