Server Backup Manager allows you to perform a bare-metal restore of Windows dynamic disks. A dynamic disk is a physical disk initialized for dynamic storage. Dynamic disks do not use partitions or logical drives. They use a database to track information about dynamic volumes on the disk and about other dynamic disks in the computer. For more information about dynamic disks, see http://technet.microsoft.com/en-us/library/cc737048%28WS.10%29.aspx.
| Note for Windows dynamic disks and software RAID If you are using Windows software RAID:# Restore your system disk (e.g., C:) while booted from Live CD.
|
1. Load the Backup Agent in recovery mode and install the manager key
Follow the instructions below to load the Backup Agent in Recovery mode and to install the Manager Key.
1. Boot the Server from Live CD or PXE Network Boot.
2. Then you may need to configure the network settings.
3. To add the key to the Backup Agent, run the following command on the Server where the Agent is installed:
| Note The --get-key function downloads the Key from the Manager. For this option to work, the Backup Manager should be up and accessible from the Agent Server via the network. |
2. Restoring Windows System Volume
Follow the instructions below to start the Bare-Metal Restore of the Windows system (boot) Volume.
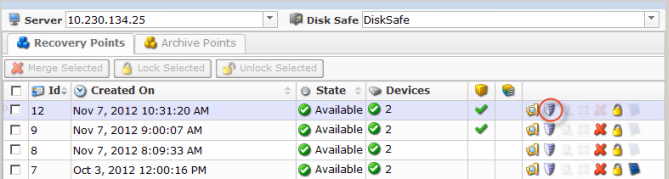
1. Click on "Recovery Points" in the Main Menu to open the "Recovery Points" screen.
2. Select a Server from the drop-down menu located on the "Recovery Points" list toolbar.
3. Select a Disk Safe from the drop-down menu located on the "Recovery Points" list toolbar.
4. In the "Recovery Points" list, click on the "Bare-Metal Restore" icon in the "Actions" column for the Recovery Point from which you are going to restore.
| Tip To find a Recovery Point, you can use the Basic and Advanced List Filters. See Customize the Recovery Points list. |
5. The "Bare-Metal Restore" window opens.
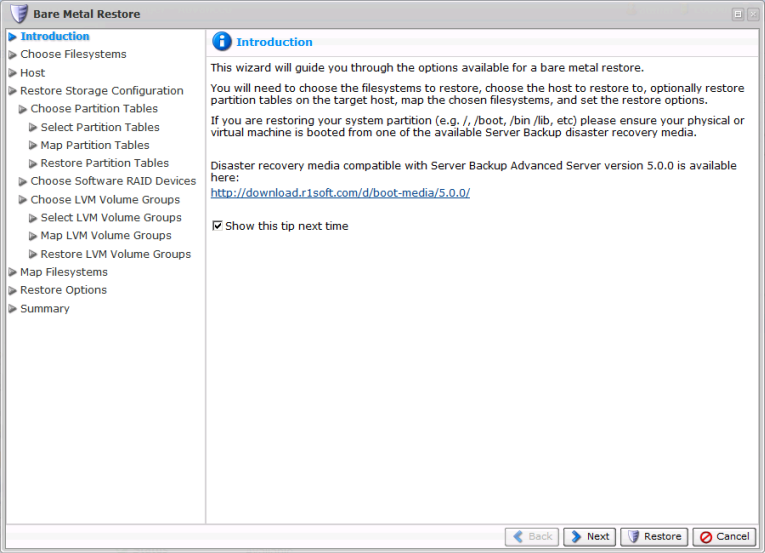
6. Look through the information on the Introduction screen and click "Next."
7. The "Choose Filesystems" step will appear.
| Note Hereinafter on this page there are some changes (for version 4.2.0). Please refer to this link [Using Bare-Metal Restore Device Auto-Mapping] explaining the new feature: Bare-Metal Restore Device Auto-Mapping. |
On the next page, select the disk where the Windows system has been previously installed. In our example, we select disk C:\. If you are restoring Windows 7 or Windows 2008 R2, you should also restore the hidden boot partition (it is the first partition marked for the restore in the screenshot below).
| Tip You can restore all disks in a single operation. In this case, select all check-boxes. |

Click "Next" to proceed to the following step.
8. On the next screen, select the "Restore to Original Host" option.
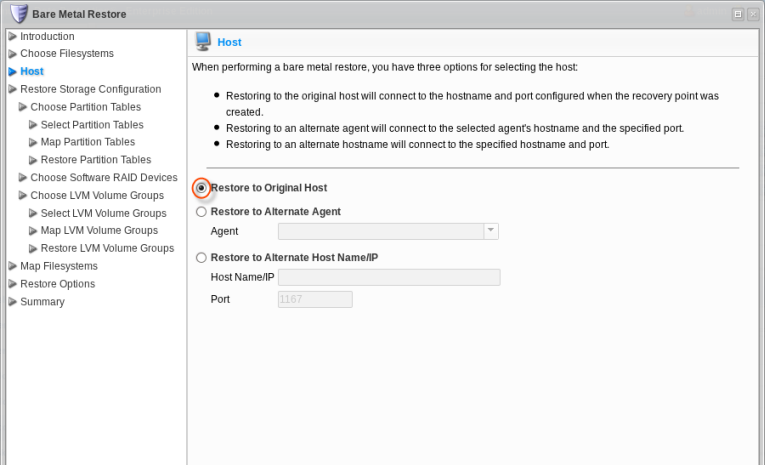
Click "Next" to proceed to the following step.
9. On the "Restore Storage Configuration" screen, choose the "Select Storage Configuration to Restore" option.
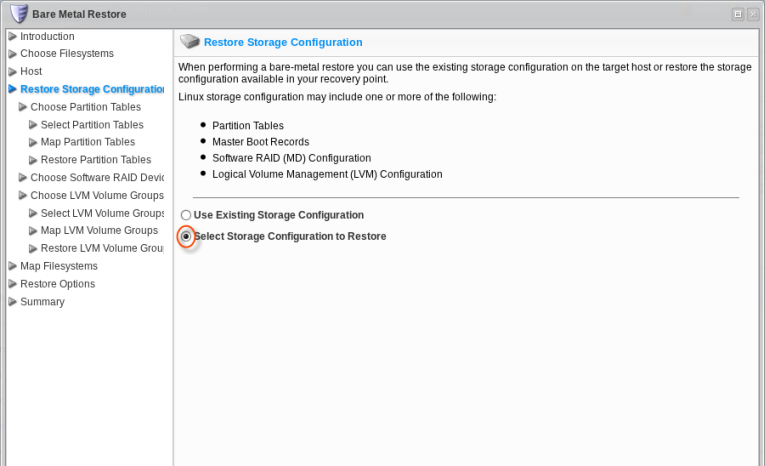
Click "Next" to proceed to the following step.
9.1 On the next screen, select the "Select Partition Tables to Restore" option. Selecting this option lets you pick partition tables from the Recovery Point to restore to the target Server.
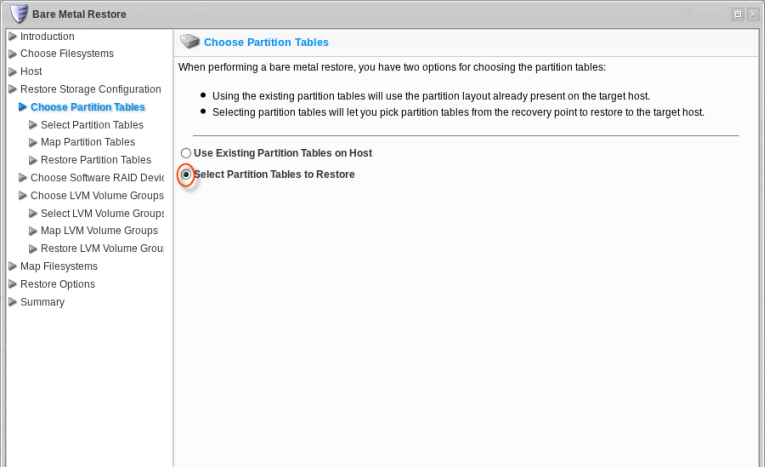
Click "Next" to proceed to the following step.
After the "Select Partition Tables to Restore" option is selected, three (3) additional steps arise:
- Select Partition Tables
- Map Partition Tables
- Restore Partition Tables
9.1.1 Selecting Partition Tables
Select the partition table layout(s) for the filesystems you want to restore.
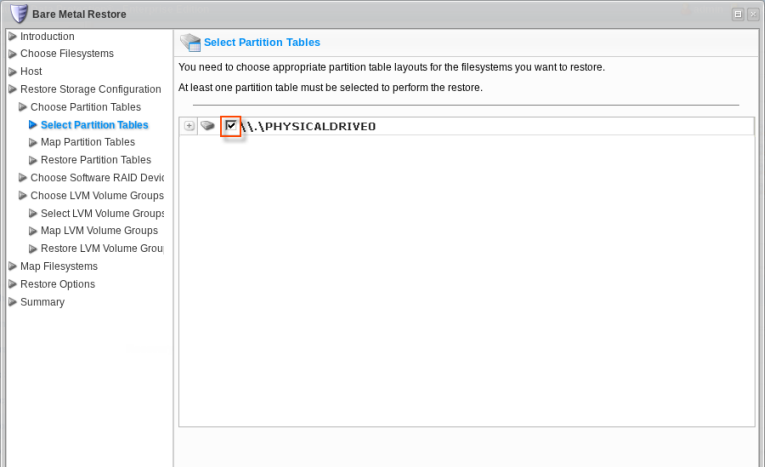
| Tip To display the partition table properties, click on the "Plus" icon in front of the partition table's name.
|
Click "Next" to proceed to the following step.
9.1.2 Mapping Partition Tables
After choosing partition tables to restore, map the selected Partition Table(s) Recovery Points to physical Disks in the Target Server. From the drop-down menu, select the physical Disks you are going to restore to.
You are provided a table that allows you to map the chosen partition tables to physical Disks on the Target Server. You can see as many lines in the table as the partition tables selected for restore. Each partition table must be mapped to a physical Disk on the Target Server before proceeding.
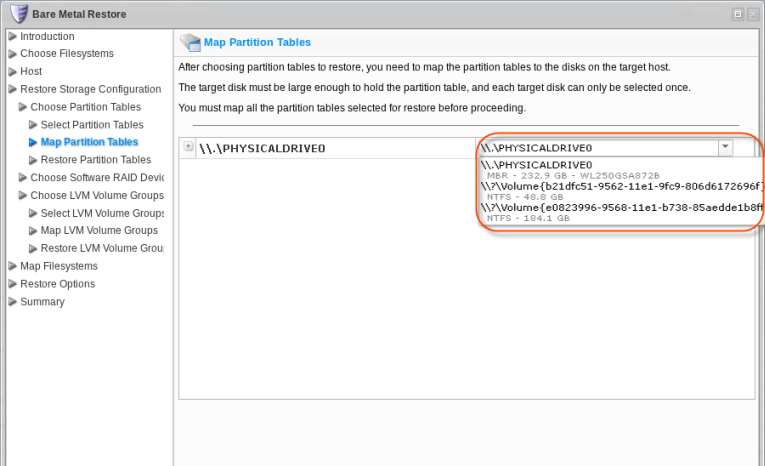
After selecting the Disks, click on "Next" to proceed to the next page.
9.1.3 Restoring Partition Tables
Perform the partition table restore by clicking on the "Restore Partition Tables" button. Once confirmed, the Partition Table Restore will be initiated. A busy indicator will be displayed while the restore is in progress. Restoring the partition table should not take a lot of time because the partition table fits into one 512-byte sector.
| Notice Restored partition tables will overwrite the existing partition table layout on the target devices. |
When the process is over, click "OK" in the notification pop-up.

Click "Next" to proceed to the following step.
10. Then on the "Restore Options" screen, select the "Reboot After Restore" option.
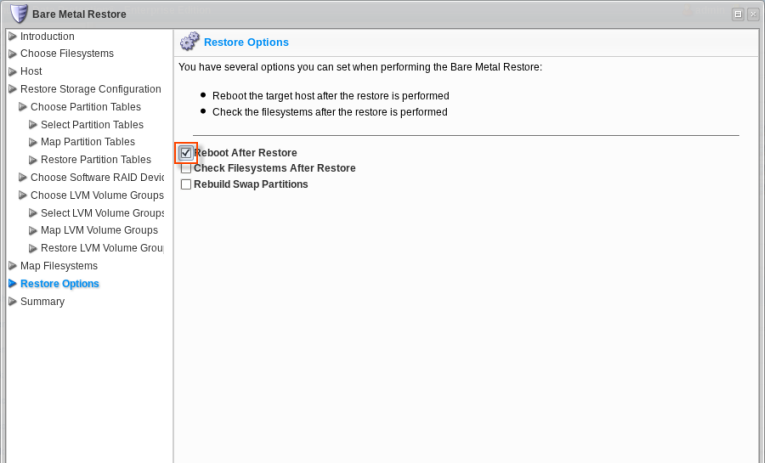
Click "Next" to proceed to the following step.
11. On the "Summary" page, you will need to confirm the selected Bare-Metal Restore options. Each selected filesystem is listed, along with the name of the target device it is being mapped to.
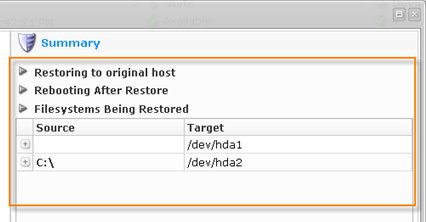
Click "Restore" to start the Bare-Metal Restore task.

12. The data Restore is initiated. Click "OK" in the notification pop-up.
| Tip The Task results can be sent via email as a Report. See Reporting. |
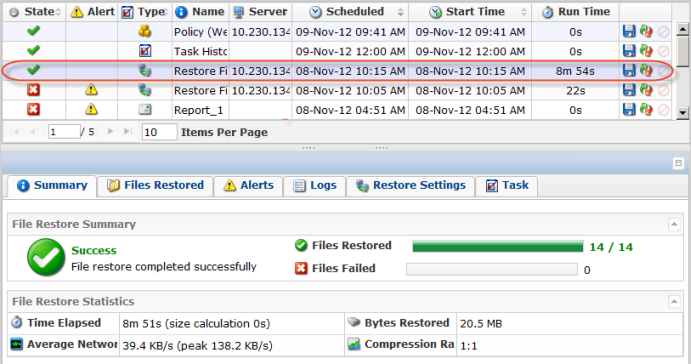
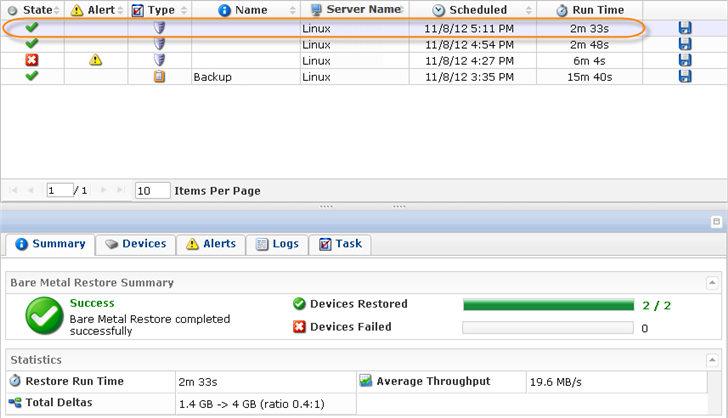
13. The Restore process will start. It can take a while because a lot of data (several gigabytes) should be transmitted over the network. You can go to the "Task History" screen to monitor the task progress. See Access task history.
The Task History page displays the State, Alert, Type, Progress percentage, and the Started time stamp of the Bare-Metal Restore process.
14. When the process is complete, the server being restored should reboot automatically. If for some reason it does not reboot, you can reboot it by pressing Ctrl-Alt-Del or by executing the reboot command in the root shell.
| Notice Make sure you eject the Disk from the CD-ROM drive so the server will boot from the hard Disk. |
| Note If the Disk you used for your Bare-Metal Restore is larger than the Disk you backed up previously, the free space on the new Disk will remain free. You can create a new Partition in this space. |
3. Booting Windows
Once the system disk has been restored, boot Windows.
4. Configuring Windows Dynamic Disks
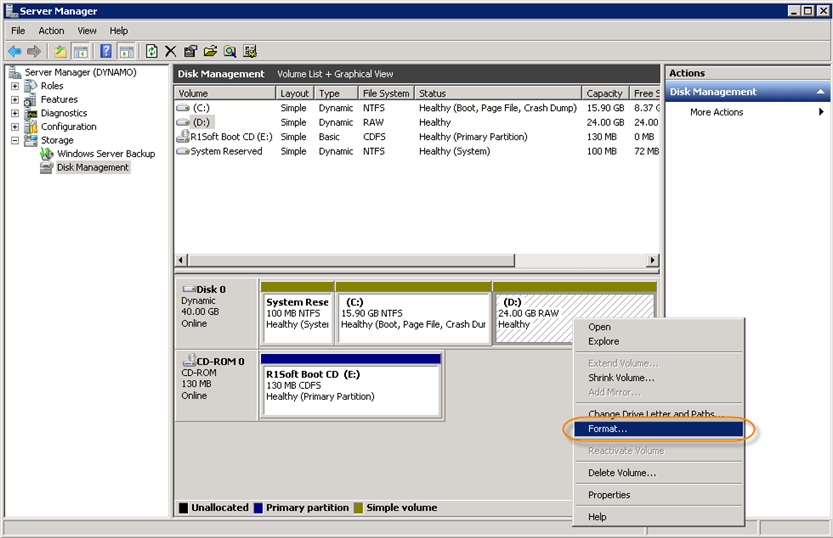
After restore, only disk C will contain all the data it should contain. All the other disks -- called "Simple Volumes" -- will be created, but will remain unformatted. You should use Windows Disk Manager to format them and then restore data to them.
| Reference Disk Management is a system utility for managing hard disks and the volumes or partitions that they contain. Disk Management enables you to perform most disk-related tasks. |
1. Run the Windows Disk Manager.
2. Create the necessary dynamic drives.
3. Format the unformatted Simple Volumes (in this example, disk D).
Find more information here:
- Disk Management in Windows XP
- Disk Management in Windows Server 2008 R2
- Disk Management in Windows 7
- Disk Management in Windows Server 2003
5. Restarting Backup Agent
When all the volumes are formatted, you should restart the Backup Agent. See Restart Backup Agent.

6. Restoring Simple Volume Filesystems
Use the Backup Manager to restore a dynamic disk filesystem.
1. Click on "Recovery Points" in the Main Menu to open the "Recovery Points" screen.
2. Select a Server from the drop-down menu located on the "Recovery Points" list toolbar.
3. Select a Disk Safe from the drop-down menu located on the "Recovery Points" list toolbar.
4. In the "Recovery Points" list, click on the "Browse" icon in the "Actions" column for the Recovery Point from which you are going to restore.
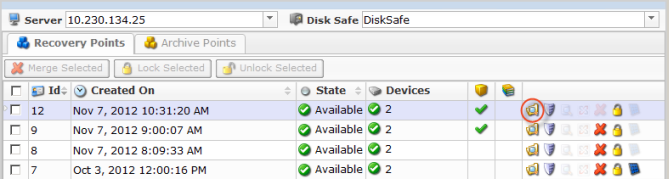
| Tip To find a Recovery Point, you can use the Basic and Advanced List Filters. See Customize the Recovery Points list. |
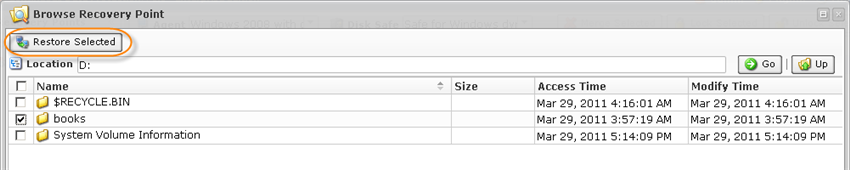
5. The "Browse Recovery Point" window opens.

See also: Browse recovery points.
6. Select the check-boxes next to the files and folders you want to restore.

7. Once the files and folders are selected, click on "Restore Selected."
8. The "Restore Files" window will open.
9. Specify the following options:
- Restore to Agent - Select the Server with dynamic disks you have just created.
- Restore to Folder - In our example, we select "Original Location".
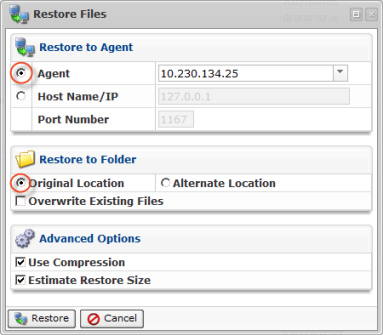
10. Click on "Restore". The process will start immediately.

| Tip The Task results can be sent via email as a Report. See Reporting. |
11. To view the Restore Task details, access the "Reporting" window. See Access task history.