Use the following instructions to create a new email reporting task in Server Backup Manager.
| Notice Make sure you configured the SMTP Host and SMTP Default Return Address in the Manager Options prior to scheduling a report. for more information about these options, see Configure Manager Options. |
1. Click Reporting in the Main Menu. Server Backup Manager displays the Reporting window.
2. In the Reporting pane, click Create New Report. Server Backup Manager displays the Create New Report wizard as shown in the following image.
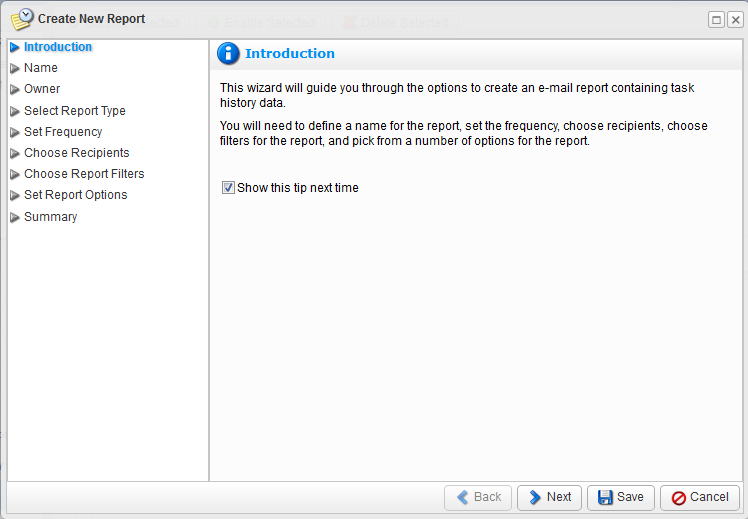
3. Review the steps in the wizard, and then click Next. If you no longer want to view this screen when opening the Create New Report wizard, clear the Show this tip next time check box before clicking Next. SBM displays the Name window as shown in the following image.
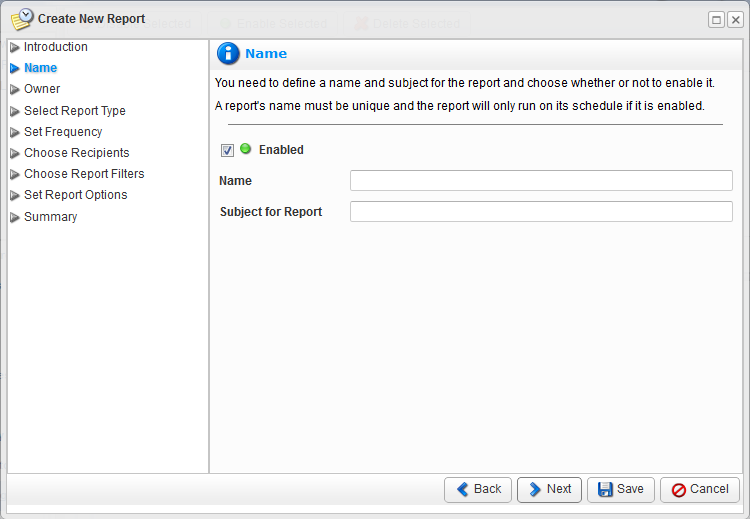
4. Type a unique report name and subject, and then choose whether you want to enable the report. You must enable the report before it runs on the defined schedule.
5. Click Next. SBM displays the Owner window as shown in the following image.
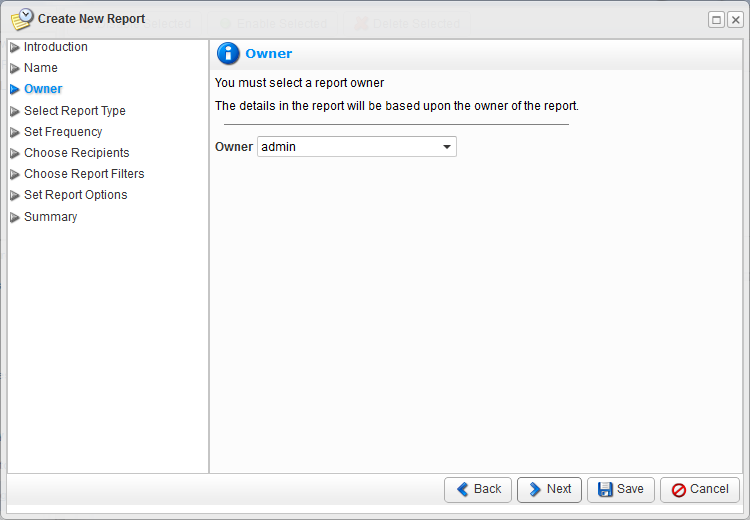
6. Select the report owner from the available list. The details of the report are based on the owner selected in this window.
7. Click Next. SBM displays the Select Report Type window as shown in the following image.
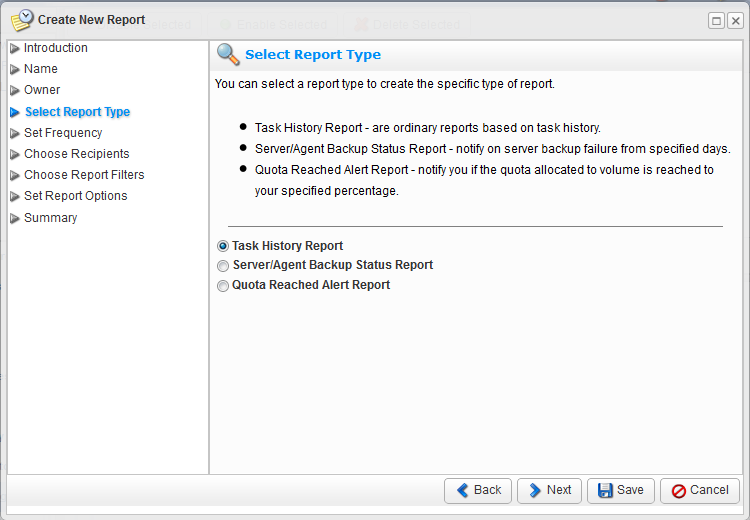
8. Select the report type you want to create. Available report types include:
- Task History Report. Provides a typical report based on task history.
- Server/Agent Backup Status Report. Notifies you of any server or Backup Agent backup failures from specified days.
- Quota Reached Alert Report. Notifies you if the quota allocated to the selected volume is reached to the specified percentage.
9. Click Next. SBM displays the Set Frequency widow as shown in the following image.

10. Select the frequently at which you want the report to run. Available frequencies include:
- On Demand. Run the report only when manually executed.
- Minutely. Defines the period in minutes of report execution. Also complete Execute every X minutes. The report runs every X minutes, where X is a value in minutes between 0 and 59.
- Hourly. Defines the starting minute of the report. Also complete Starting Minute. Select the start time (minutes after the hour) at which you want the report to run.
- Daily. Defines the starting minute and day hours of report execution. Also complete Starting Minute and Hours of Day. Specify the start time in hours and minutes.
- Weekly. Defines the start time in hours and minutes and days of week of report execution. Also complete Start Time and Days of Week. Specify the start time in hours and minutes and select one or more week days on which you want the report to run.
- Monthly. Defines the start time in hours and minutes and days of month of report execution. Also complete Start Time and Days of Month. Specify the start time in hours and minutes and select the day of the month on which you want the report to run.
- Yearly. Defines the start time in hours and minutes, days of month, and months of year of report execution. Also complete Start Time, Day of Month, and Months of Year. Specify the start time in hours and minutes, the day of the month on which you want the report to run, and select one or more months in which you want the report to run.
11. Click Next. SBM displays the Choose Recipients window as shown in the following image.
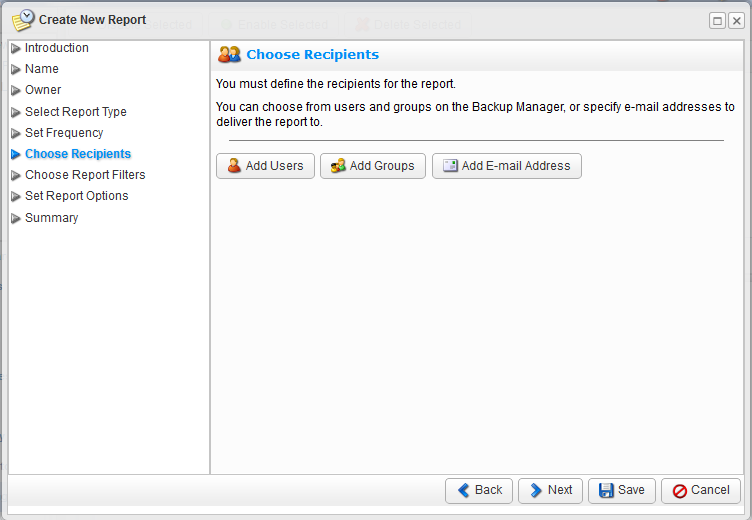
12. Define the recipients of the report. Click Add Users to select specific users on the Backup Manager, click Add Groups to select specific groups on the Backup Manager, or click Add E-mail Address to specify email addresses to which you want to send the report.
13. Optional. If you want to restrict the permissions for a user or group, clear the appropriate check box for the permission you want to remove from the selected user or group. Available permissions include:
- Can view report from UI. Clear this check box to prevent this user or group from viewing the report in the user interface. This user or group can only receive the report in an email message.
- Can receive report via email. Clear this check box to prevent this user, group, or email address from receiving the report in an email message. This user or group can only view the report in the user interface while this email address cannot view the report at all.
14. Click Next. SBM displays the Choose Report Filters window as shown in the following image.
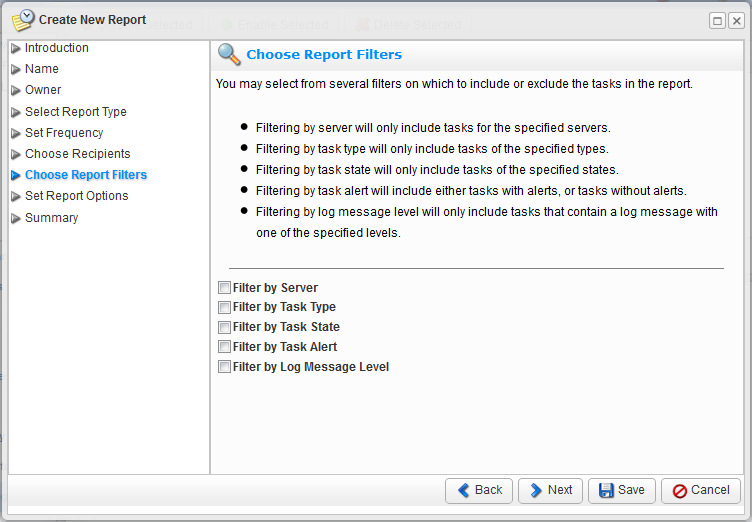
15. Choose one or more filters to apply to tasks in the report. Note that when you choose a filter, the wizard adds the next window you visit based on your selection. Available filters include:
- Filter by Server. Include tasks for the specified servers.
- Filter by Task Type. Include tasks of the specified types.
- Filter by Task State. Include tasks of the specified states.
- Filter by Task Alert. Include either tasks with alerts, or tasks without alerts.
- Filter by Log Message Level. Include tasks that contain a log message with one of the specified levels.
16. Click Next. SBM displays one of the following windows depending on your selection in the Report Filters window.
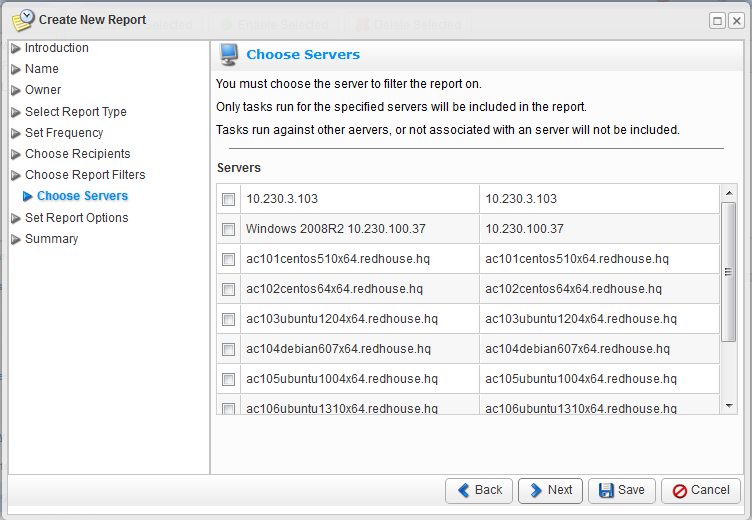
- Choose Servers. If you select Filter by Server in the previous window, then SBM displays the Choose Servers window as shown in the following image.
Check the appropriate server(s) on which you want to filter the report. The Email Report contains data about only those tasks run for these selected servers. Tasks run against other servers or not associated with a server are not included in the report.
- Choose Task Types. If you select Filter by Task Type in the previous window, then SBM displays the Choose Task Types window as shown in the following image.

Select the appropriate task type from the available list, and then click Add. Available task types include:- Archive Recovery Points
- Bare Metal Restore
- Data Protection Policy
- Database Restore
- Delete Archive Points
- Disk Safe Replication
- Disk Safe Verification
- Exchange Restore
- Merge Recovery Points
- Remote Agent Deployment
- Reporting
- Restore Control Panel User Data
- Restore Files
- System
- Task History Clean-up
- Vacuum
- Choose Task States. If you select Filter by Task Type in the previous window, then SBM displays the Choose Task Types window as shown in the following image.
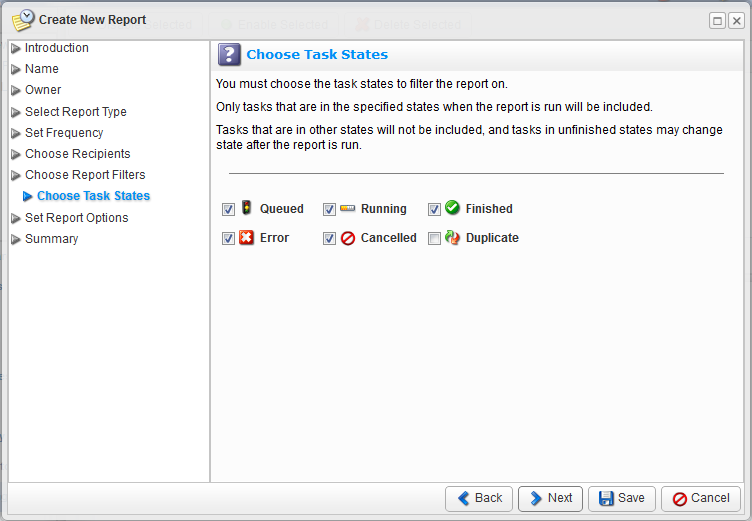
Check the appropriate state(s) on which you want to filter the report. The Email Report contains data about only those tasks in the selected state(s). Tasks in other states are not included in the report. Note that tasks in unfinished states may change state after the report runs. Available task states include:- Queued
- Running
- Finished
- Error
- Cancelled
- Duplicate
- Choose Task Alerts. If you select Filter by Task Alert in the previous window, then SBM displays the Choose Task Alerts window as shown in the following image.
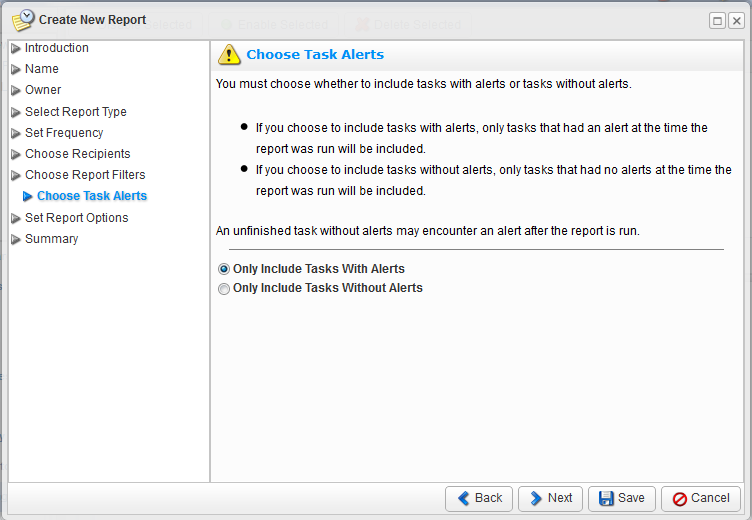
Select whether you want to include tasks with or without alerts based on the following selection:- Only Include Tasks with Alerts. If you choose to include tasks with alerts, only tasks that have an alert at the time the report runs are included.
- Only Include Tasks without Alerts. If you choose to include tasks without alerts, only tasks that have no alerts at the time the report runs are included. Note that tasks in unfinished states may encounter an alert after the report runs.
- Choose Log Message Levels. If you select Filter by Log Message Level in the previous window, then SBM displays the Choose Log Message Levels window as shown in the following image.
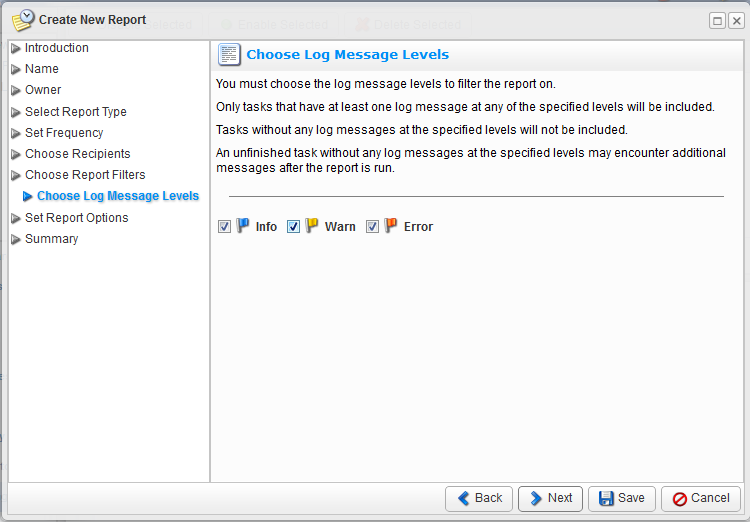
Check the appropriate log message level(s) on which you want to filter the report. Only those tasks with at least one log message are included in he report. Tasks without a log message are not included in the report. Note that tasks without any log messages may encounter a message after the report runs. Available log message levels include:- Info
- Warn
- Error
17. After completing the appropriate report filters, click Next. SBM displays the Set Report Options window as shown in the following image.

18. Check the options you want to include in this report. Available options include:
- Send Individual Emails. Send the report as a separate email message to each recipient on the list.
- Send Empty Reports. Send the report even if there is no new data since the last time it ran.
- Include Full Alert Details. Include the full alert details, which will include the full text of the alerts and their associated log messages.
- Specify From Address. Specify a from address for the email instead of the Backup Manager default address. Also complete From Address with the address you want to use.
19. Click Next. SBM displays the Summary window as shown in the following image.

20. If your summary is accurate, click Save to add the report to the system. If the summary is not accurate, return to the appropriate window within the wizard to make your changes before clicking Save.
21. Click OK to close the confirmation window.
You can verify your report by accessing the Reporting window and reviewing the available report details.