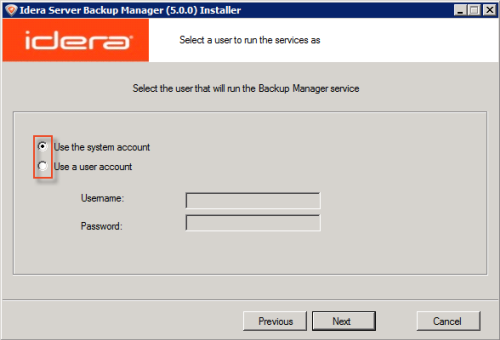
| Note During the installation process you are prompted to select the User you want to run the Backup Manager service as. By default, the "system account" is selected. It is safe to leave the default value untouched. The only exception is when you want to run the manager on behalf of a Domain User that has local administrative rights.
|
On the machine where you have Backup Manager installed, you can change the account under which to run this application. Backup Manager Configuration Utility allows you to do so.
Follow the instructions below to configure the account using the Backup Manager Configuration Utility.
1. Run Backup Manager Configuration Utility by going to Start > All Programs/Programs > Idera Server Backup > Backup Manager Configuration Utility.
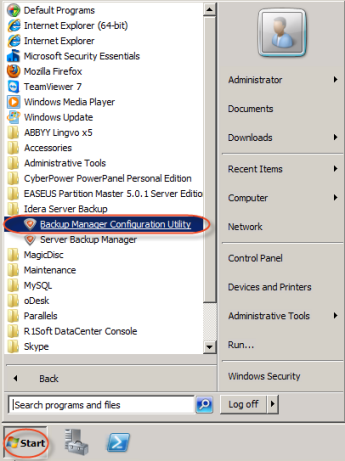
2. Select the "Server Configuration" tab.
| Free, Advanced |  |
|---|---|
| Enterprise |  |
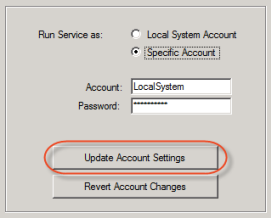
3. Select one of two available options:
- Local System Account
- Specific Account
If you choose the second option, then define the account name and login.
| Note If you are going to store Disk Safes at a network share, make sure the selected user has permission to write to the network share. See also: Error - Could Not Create Disk Safe Directory (Backup Manager Knowledge Base). |
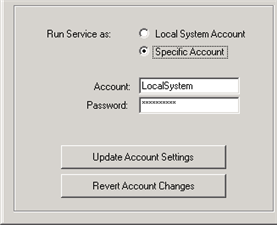
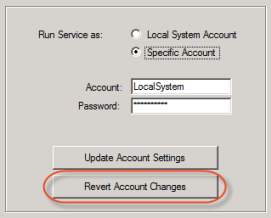
If necessary, click "Revert Account Changes" button to select the default account selected during installation.
4. Click on the "Update Account Settings" button to apply the changes.
5. The confirmation dialog will appear. Click "OK."
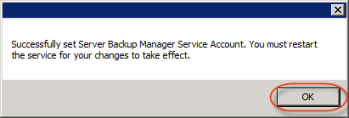
6. Now you must restart the backup manager service for your changes to take effect. See Restart Backup Manager.
| Note You can read how to do the same operation using the Windows built-in tools here: Error - Could Not Create Disk Safe Directory (Backup Manager Knowledge Base). |